Router guide

Quick links
- Common broadband setup questions
-
How to connect to your WiFi
-
Still need help? Raise a ticket
Just signed up?
1. When will my router arrive?
Your router should be with you within two weeks of signing up. If there are any delays, you'll be the first to know. Once it's been collected by our courier you'll be provided with tracking info, to keep an eye on things.
2. Will an engineer need to visit my property?
If your property has not been connected to Virgin Media previously, an engineer will be required to come to the property to set this up and install a wall socket this will have been arranged for you. ou can see the status of this in your broadband tracker. Please note they may need to visit more than once.
The appointment usually takes between 30 minutes to 2 hours in order for the engineer to set your services. The engineer will arrive in a Virgin Media van and be carrying ID, so they’ll be easy to spot
3. Do I need to activate my router?
No, as we have arranged your broadband through Virgin Media Business we have already activated the line for you! In most instances (98% of the time) your router will be QuickStart meaning you just need to plug it in and go!
4. I have moved in and an existing router is here, can I use this?
If you've moved in and there is an existing router at the property unfortunately this cannot be used. The providers associate a new router to your line. For virgin media these are encoded for secruity purposes and have a dedicated MAC address.
We will always look to send the router to the address via DPD tracked delivery in line with your go live date
5. Where is my wall socket?
Wall sockets are tricky as there is no set location for these.
They are usually in a communal area such as living room or the front bedroom if youre in a student property.
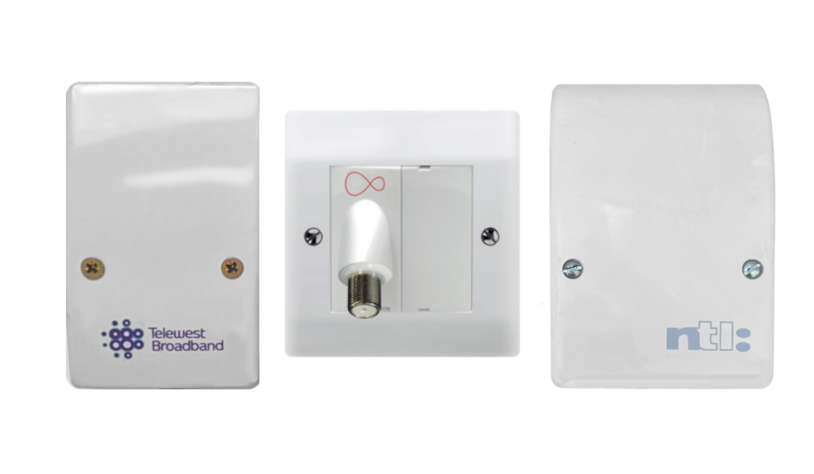
If you're struggling to locate your wall socket take a look at the installation guide below to see what your wall socket should look like.
If you still can't find it, there should be a brown box on the exterior (usually on the front of the property/nearest street entrace) and this should feed in to the property. There should be a correlating wall socket on the inside and this will say Virgin Media, NTL or Telewest and this is the socket you need to use.
6. What is my broadband speed
DOWNLOAD: It’s the speed that matters, how fast your internet connection is able to retrieve data from the internet. Browsing, streaming and everything in between is affected by this and it’s the speed most providers focus on.
UPLOAD: Upload speed refers to the speed that your internet connection can allow data to be sent from your devices to the internet. Usually relevant for uploading content like photos, videos or your webcam during a video call.
Want to test your speed? 👉 https://www.speedtest.net/
.png?width=265&height=500&name=router-(1).png)

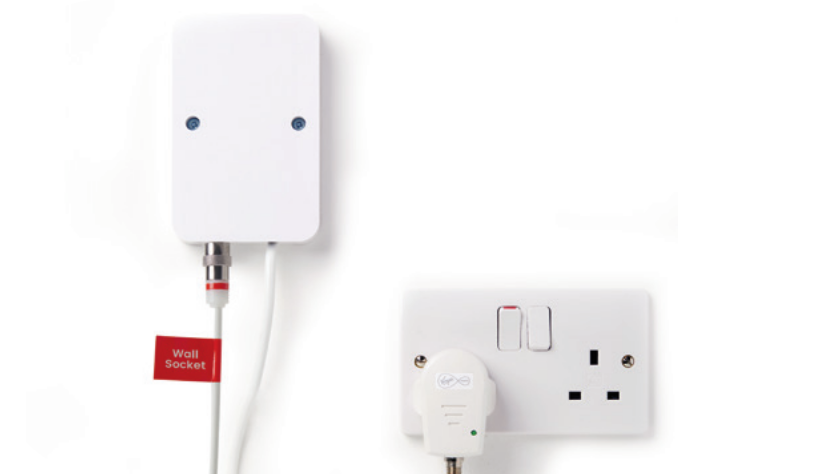
1. Find your isolator cable
You can use the isolator cable that is plugged into your Virgin Media socket on your wall. It will look something like this.
Different kind of wall socket?
2. Getting you connected
Connect the black-banded end of the isolator cable to the socket of your Hitron. Push it firmly into place.
Depending on which cable you have you might need to use the spanner


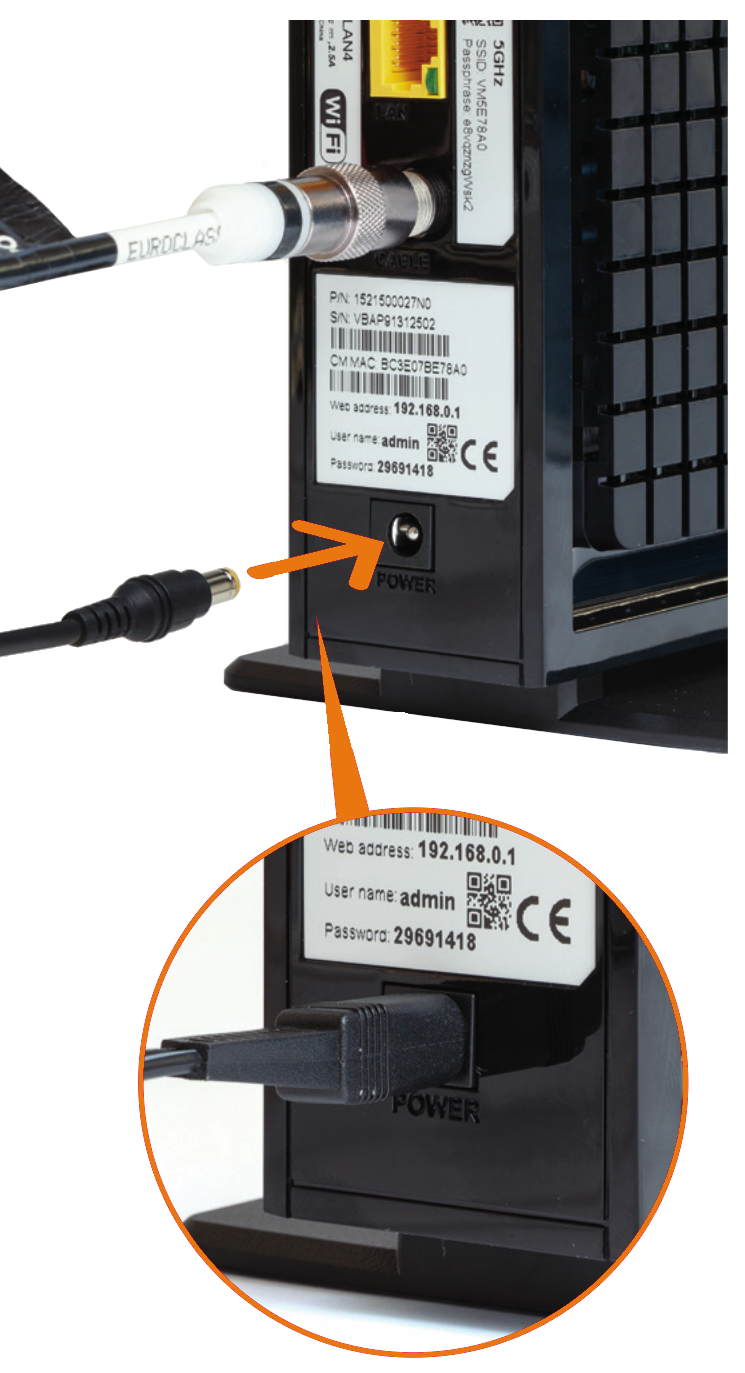
3. Power supply
Plug the power supply into a mains socket
4. Connect power supply
Connect the power supply to your Hitron, switch on at the mains socket and then switch on your Hitron
5. Starting up
Your Hitron will now connect to our Fibre network and download
the latest software update.
During this time your Hitron may reboot as it downloads the updates. This can take up to 30 minutes.
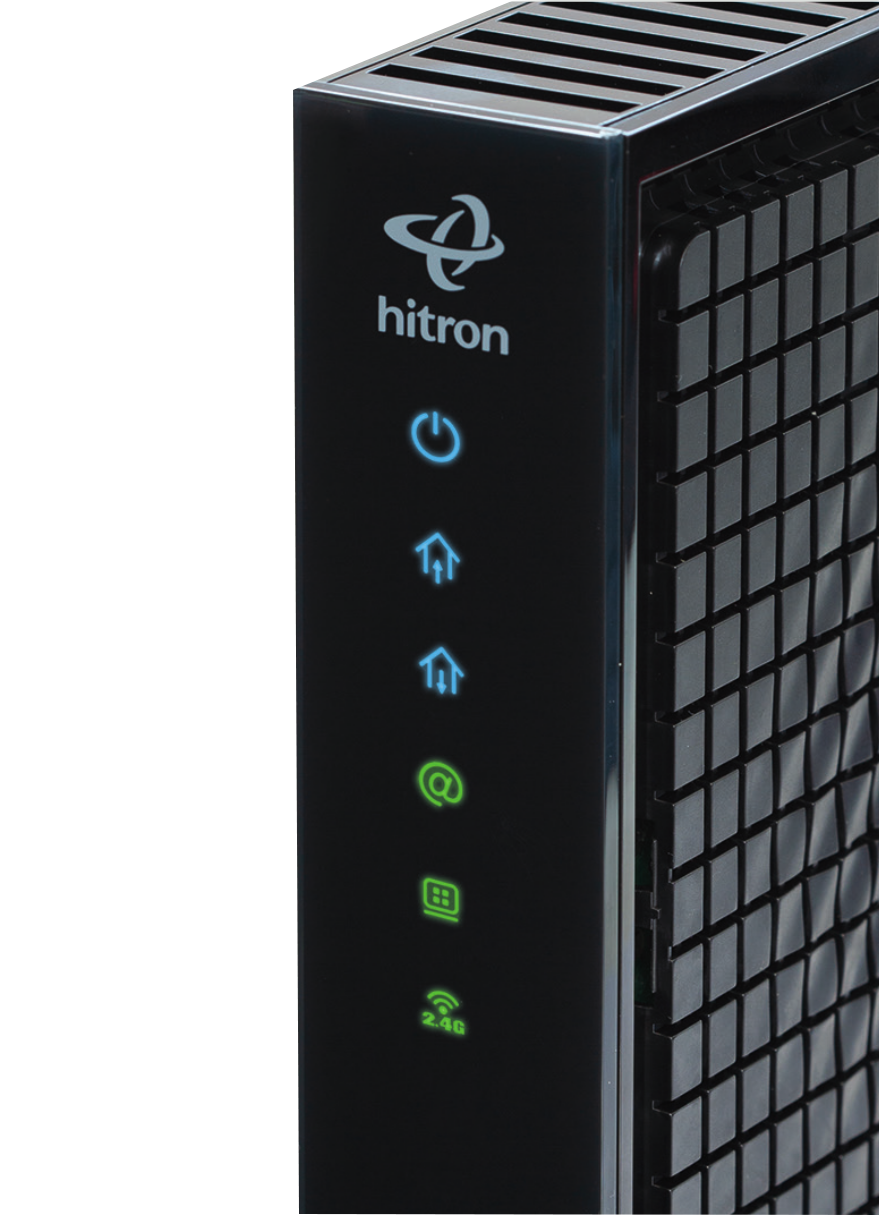
When the Wi-Fi light is on, and the downstream and upstream lights are solid blue, you should now have internet connectivity.
If your internet connection ISN’T working after following the install process, please call 0800 052 0800
6. WiFi settings & connection details
Your new WiFi network will be called something like VM123456.
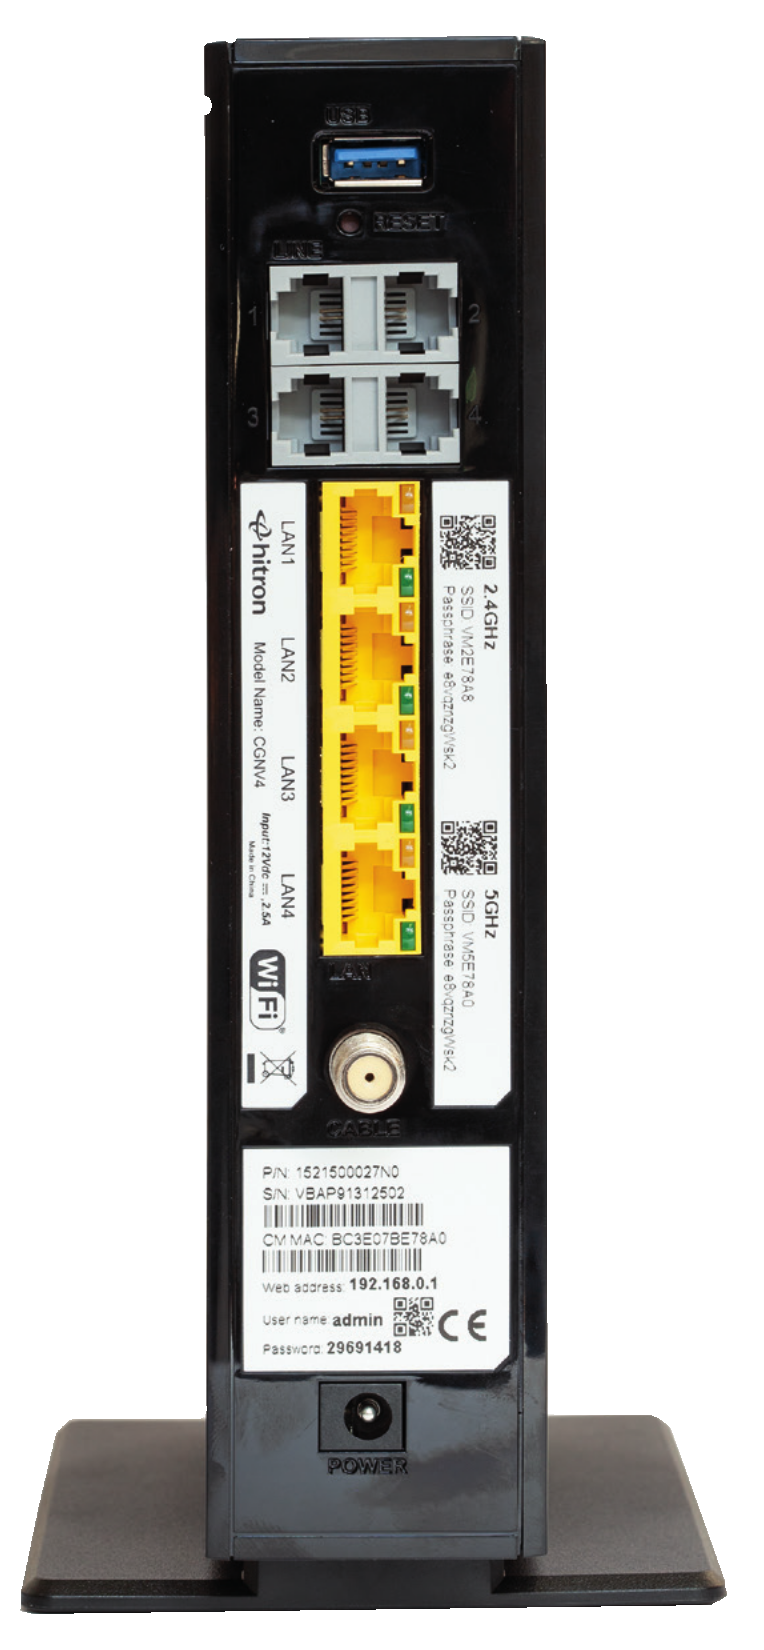
The connection details are on the back of your Hitron.
Your Hitron operates on two networks, 2.4 and 5GHz - each have their own SSID (Service Set IDentifier).
If you’re familiar with connecting to WiFi networks you can use these details to connect now.
Check your router
Please check the details on your Hitron – the details shown here are just an example.
7. Connect Ethernet cable
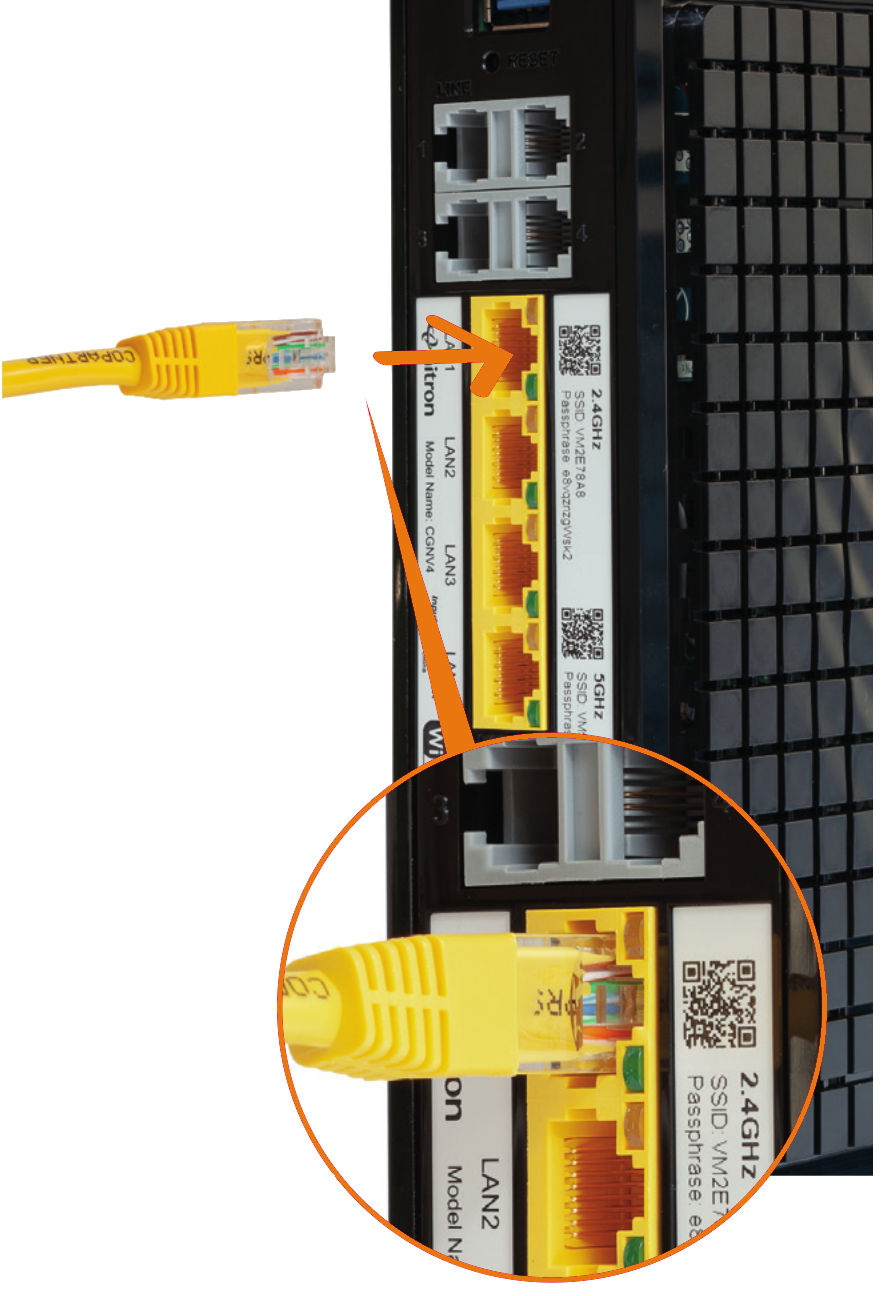
If you wish to connect a device like a laptop or PC to your Hitron, connect one end of the Ethernet cable to one of the Hitron’s Ethernet ports and push it firmly into place, then connect the other end to your device.
8. Connect tablet or mobile
Connecting to WiFi is very similar on Android or on iOS. On your tablet or mobile go to the settings area. Select WiFi from the list of options. Make sure it is on.
Your device will list all nearby WiFi networks. The one that you are looking for will be called something like VM123456
.
Click on that network and you will be asked to enter your password. The information on network name and password can be found on the back of your Hitron.
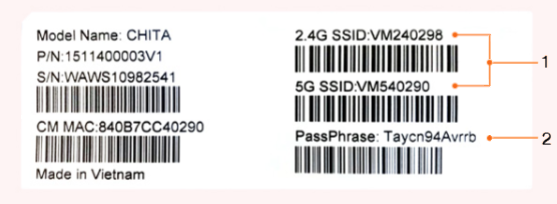
- WiFi Network Name (SSID)
This is the network name broadcasted by your router. You need to select either 2.4GHz or 5GHz network name (if shown) from your computer or device’s wireless manager to connect wirelessly. The Hitron router has a dual concurrent WiFi feature. - Passphrase
This is the passphrase (or WiFi password) you’ll be prompted to enter after selecting your WiFi network name (SSID).
Connect with QR code
Your Hitron has a QR code for each SSID that can be scanned on mobile device to automatically connect to the network
Connecting a Windows computer
Finding your connection
Finding your network is easy but it’s a bit different depending on which version of Windows you have. For Windows 10, 7 and Vista you’re looking for a network icon in the bottom right of your screen. It might look like the symbols above
Windows 8?
For Windows 8, that network icon can be found in the settings area, which is on the Home screen marked by a cog icon.
Which is my WiFi?
Your WiFi network name will be something like VM123456.
Connecting manually
To connect manually with Windows find the network on your computer first, click the connect button and then enter the WiFi password.
Click to confirm
USB Port
The USB port on your
Hitron will not work as it has
been deactivated.
WSP Button
The WPS button on your
Hitron will not work as it has
been deactivated.
Connecting a Mac computer
Finding your connection
On Mac OS a list of networks can be found under the WiFi icon at the top of your screen.
If this icon isn’t there you’ll need to go to System Preferences > Network > Wi-Fi.
Your network name will be
something like VM123456.
Connecting manually
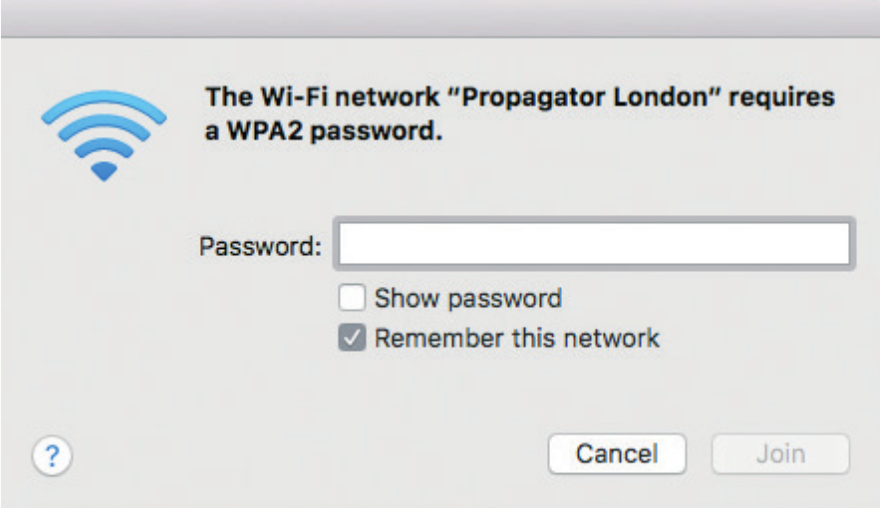
To connect manually with Mac OS, first find the network on your computer. Click the network name then enter the WiFi password and click OK to confirm
Checking your wireless network settings
To see the device’s connection status you’ll need to log into the Hitron Network Manager then click the wireless network settings button on the left hand side.
Wireless
Select the relevant tick box to Enable/Disable 2.4GHz or 5GHz wireless functionality on your router. Please see page 28 for more information.
Security mode
We recommend you select the ‘WPA Auto’ option. This gives good security and the connection is supported on most computers and devices.
SSID
This is the Service Set Identified (the name for your wireless network). Simply leave it as the default, or change the name to something else if you prefer.
Passphrase
You’ll find this on the back of your router. You can change it so it’s more secure if you like.
Channel
Your router will automatically scan and set itself to the best available channel – but if you want to you can choose any channel you like. This is handy if there are signal interruptions caused by microwaves, DECT phones or something similar.
Please note
If you’ve already got a Hitron Chita router from us and want to take advantage of one of our multi-static IP address options (e.g. 5 or 13 static IP addresses), then you’ll need an additional router to enable the full WiFi capability. You can purchase the additional router from anywhere.
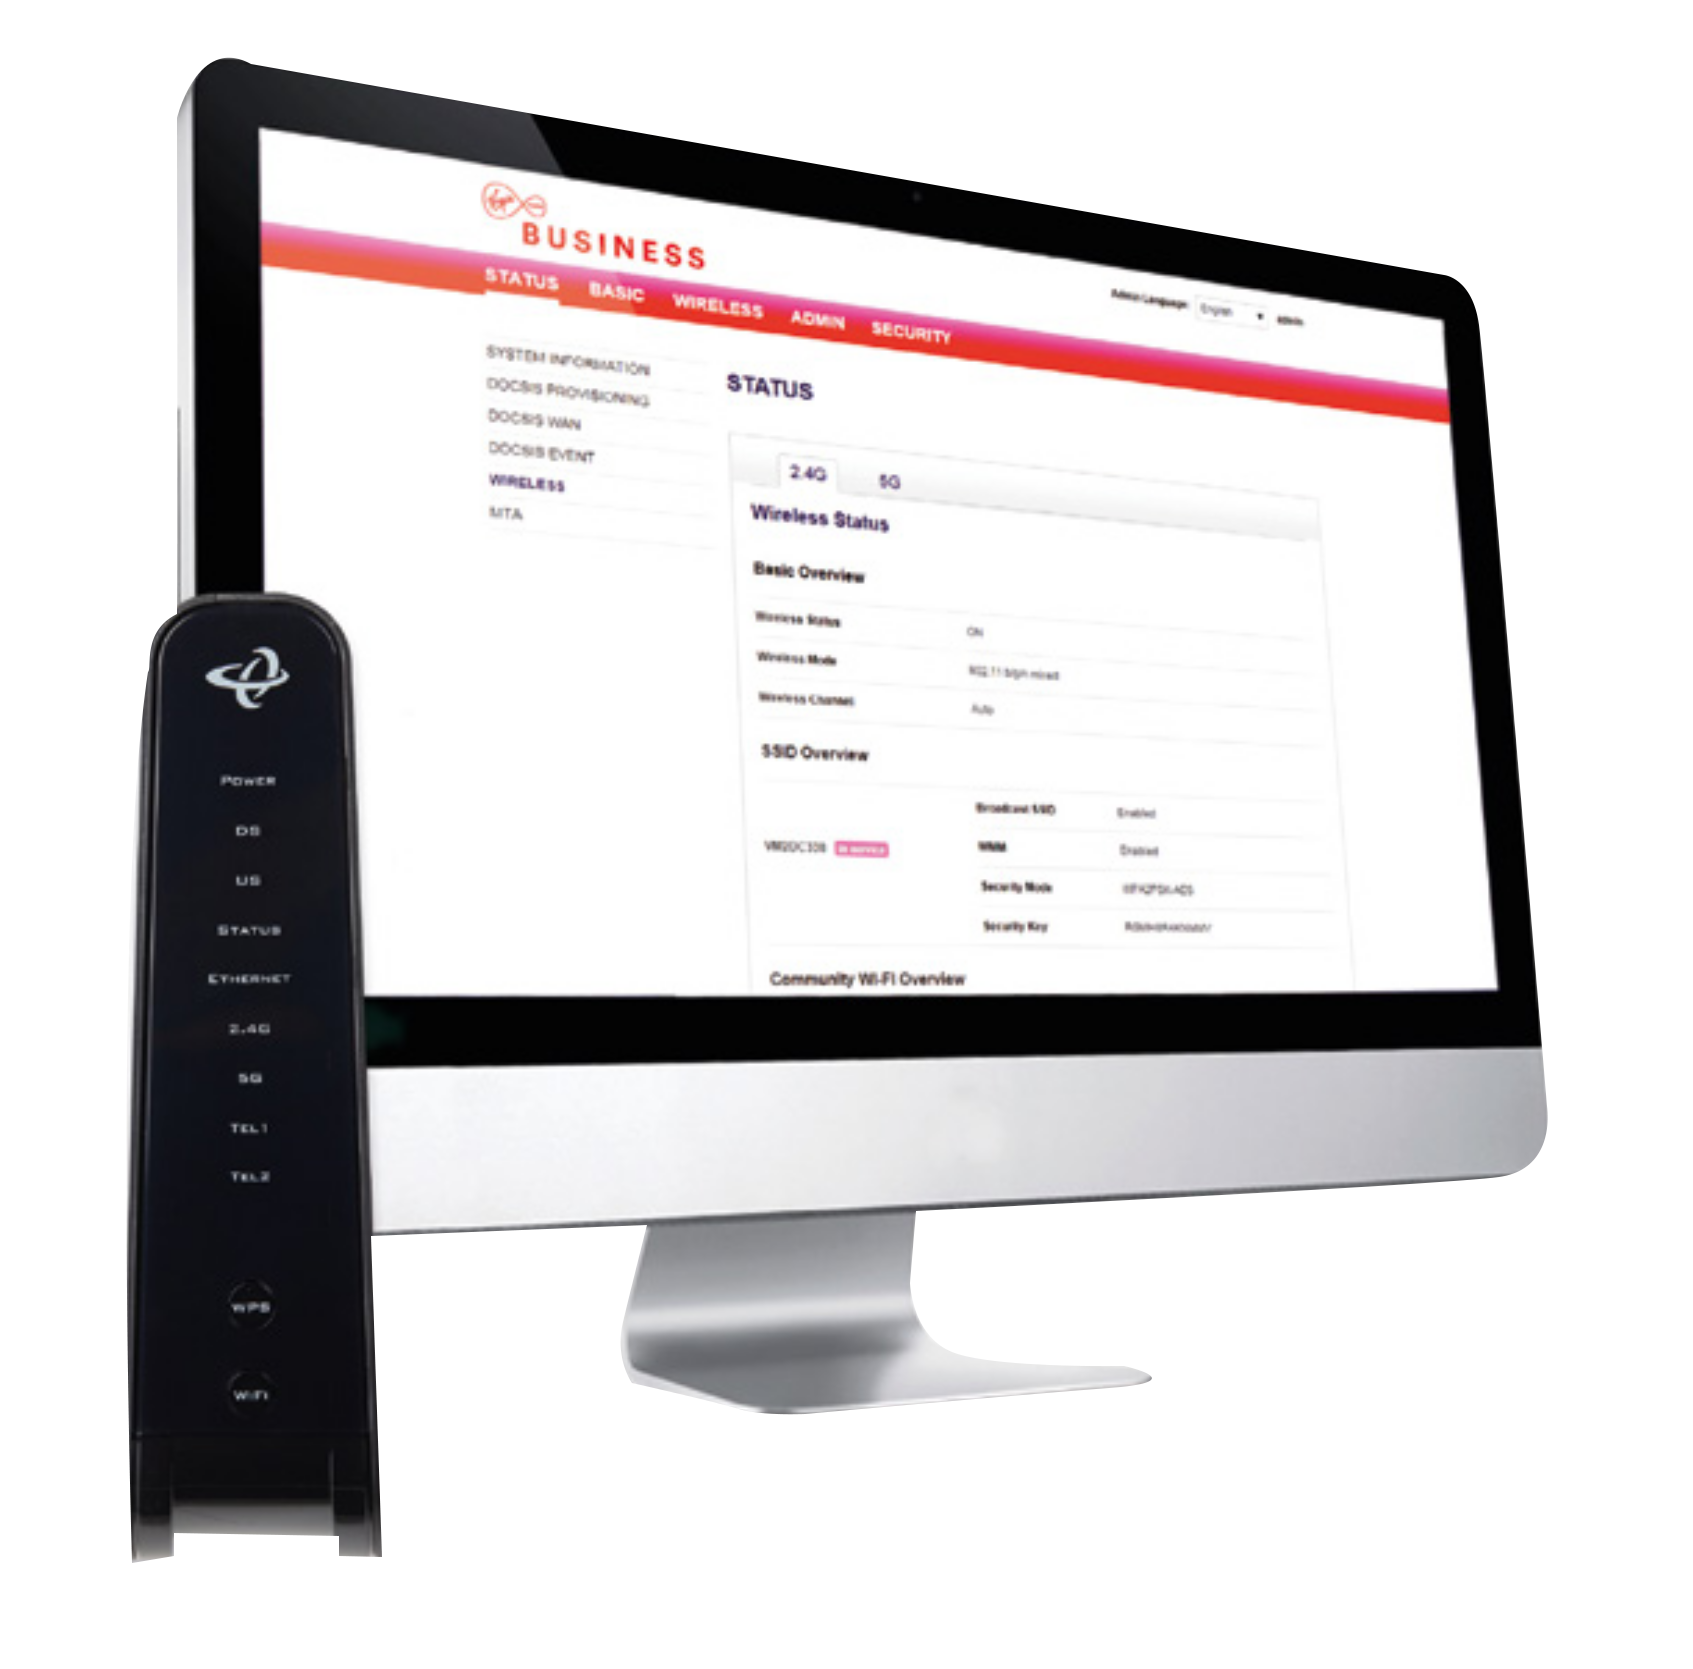
Configuring your wireless
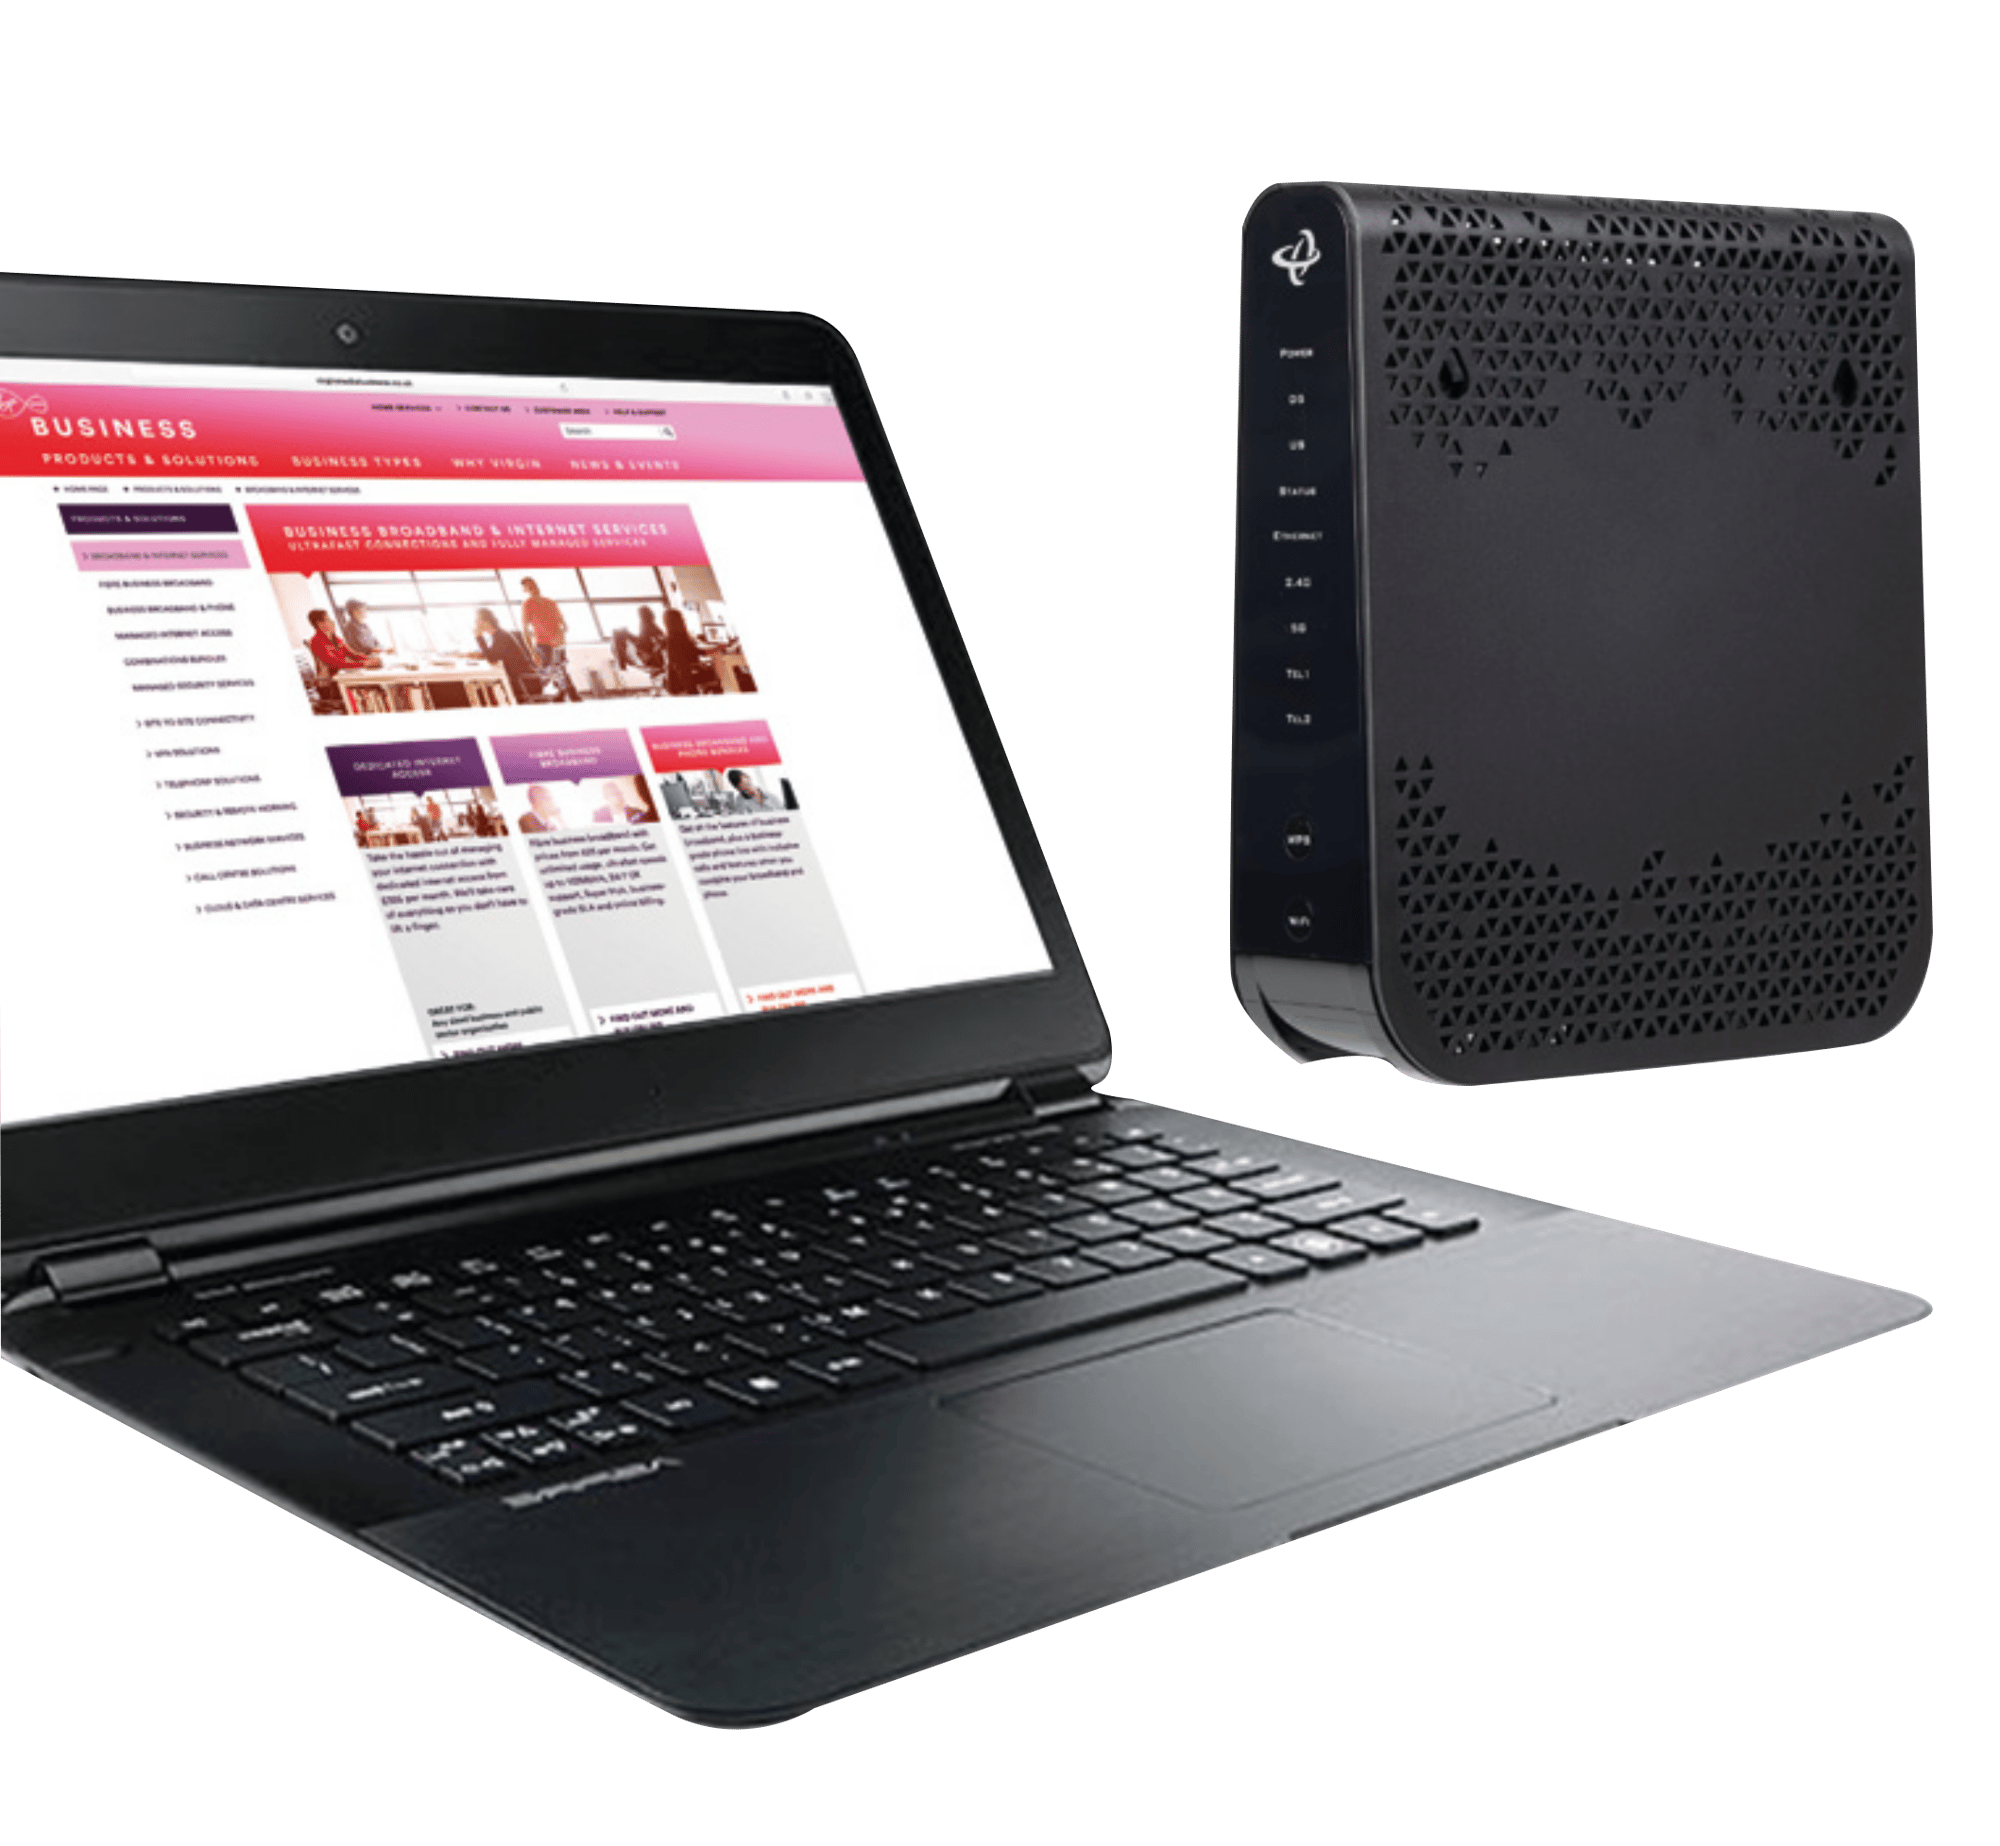
Activating your WPS push-button
By default, your WPS push-button will be switched off. To activate it, you will need to use your GUI until the new firmware is available.
Get started by following the steps below:
- Step 1: Browse to 192.168.0.1
- Step 2: Enter your Username and Password
- Step 3: Go to WIRELESS
- Step 4: Go to 2.4G and Toggle WPS (ON/OFF) to ON
- Step 5: Go to 5G and Toggle WPS (ON/OFF) to ON
- Step 6: Save Changes
You’ll need 2.4GHz and 5GHz.
Connecting a wireless device:
There are two ways to connect a wireless device to your router. Either follow the simple WPS push-button method below, or follow the manual method outlined for your device above.
Simple WPS push-button method:
- Step 1: Press and hold the round WPS button until it flashes.
- Step 2: Open your device’s Network Manager, or find the WPS button on your device. Make sure you do this within two minutes of the button flashing. If you can’t find it, follow the manual method on the next few pages, or check your device’s user manual.
What do the lights on your router mean?
| LED | STATUS | DESCRIPTION |
| POWER | ||
| Off | The router is not receiving power. | |
| Green (Steady) | The router is receiving power. | |
| DS (Downstream) | ||
| Off | There is no downstream activity on the CABLE connection. | |
| Blue | The router is engaged in channel bonding on the downstream connection. | |
| Green (Blinking) | The router is searching for a downstream frequency on the CABLE connection. | |
| Green (Steady) | The router has successfully located and locked onto a downstream frequency on the CABLE connection. | |
| US (Upstream) | ||
| Off | There is no upstream activity on the CABLE connection. | |
| Blue | The router is engaged in channel bonding on the upstream connection. | |
| Green (Blinking) | The router is searching for an upstream frequency on the CABLE connection. | |
| Green (Steady) | The router has successfully located and locked onto an upstream frequency on the CABLE connection. | |
| DS & US | ||
| or | Green (Blinking) or Blue (Blinking) | The router is downloading firmware. A reboot will occur upon successful completion. |
| STATUS | ||
| Green (Blinking) | The router's cable modem is registering with the service provider's CMTS. | |
| Green (Steady) | The router's cable modem has suiccessfully registered with the service provider and is ready for data transfer. | |
| ETHERNET | ||
| Off | The router's cable modem is registering with the service provider's CMTS. | |
| Blue (Steady) | The 2.4GHz wireless network is enabled, and data is being transmitted or received over the 2.4GHz wireless network. | |
| Green (Steady) | The CHITA’s cable modem has successfully registered with the service provider and is ready for data transfer. | |
| 2.4GHz | ||
| Off | The 2.4GHz wireless network is not enabled. | |
| Green (Steady) | The 2.4GHz wireless network is enabled, and no data is being transmitted or received over the 2.4GHz wireless network. | |
| Green (Blinking) | The 2.4GHz wireless network is enabled, and data is being transmitted or received over the 2.4GHz wireless network. | |
| 5GHz | ||
| Off | The 5GHz wireless network is not enabled. | |
| Green (Steady) | The 5GHz wireless network is enabled, and no data is being transmitted or received over the 5GHz wireless network. | |
| Green (Blinking) | The 5GHz wireless network is enabled, and data is being transmitted or received over the 5GHz wireless network. | |
| WPS | ||
| Off | WPS is OFF. | |
| Bi-Colour Blinking | The router's WPS is processing. | |
| Red (Blinking) | Error or Failure has occured in the router's WPS. | |
| Green (Steady) | The router's WPS is in linked status. | |


